Well technically speaking, charcoal is burnt organic material. Usually the material is wood. There are a few types of charcoal used by artists to create a drawing. These types of charcoal include "vine" and "compressed".
Vine charcoal usually consists of burnt willow wood. Vine charcoal is easily spread on a surface and is very easy to erase. As a consequence it is generally makes a lighter mark when you draw than compressed charcoal and easily smudges. (Which may be a benefit.)
Compressed charcoal is held together by a gum binder and is darker than vine charcoal. As a result, it is harder to erase, harder to smudge, but makes a darker mark. Compressed charcoal may come as a round stick, a square stick, or in a pencil. (Vine charcoal is almost always a round stick.) Some compressed charcoal is pigmented. This is the case with white compressed charcoal.
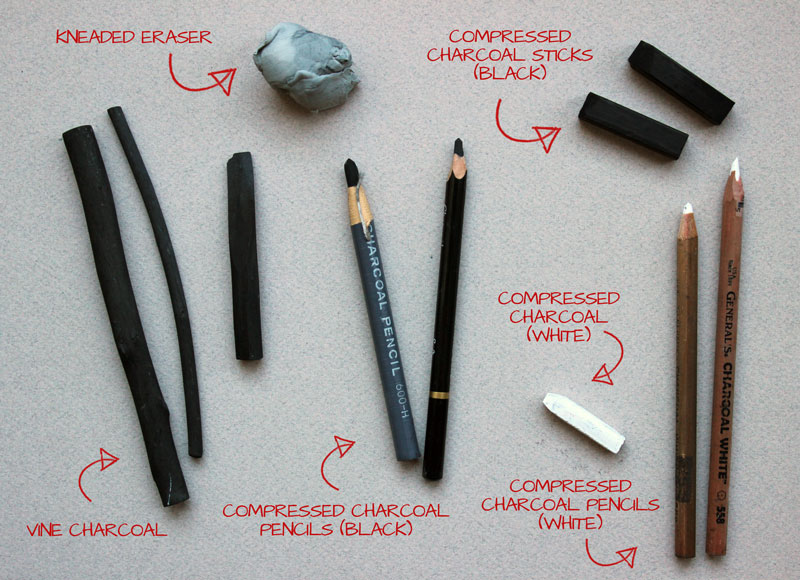
When using charcoal to draw, a few tools will need to be at your disposal. First, you may need a variety of different types of charcoal- vine, compressed, pencil form. You will also want to have a kneaded eraser.

Kneaded Eraser - A kneaded eraser is a special type of eraser that is designed to lift the material off of the surface. Kneaded erasers work especially well with charcoal.
Blending Stumps - You may also want to have a blending stump. A blending stump will allow you to have full control over the blending and smearing of the charcoal. You can create a blending stump by tightly rolling up drawing paper to a point.
If you are drawing on a flat surface, it's also a good idea to have a paper towel handy. You can lay the paper towel between your hand and the surface of the drawing, so that your hand doesn't smear your work.
Vine charcoal and compressed sticks should be held differently in your hand than a drawing pencil. It will vary from artist to artist, but my suggestion is to hold the charcoal with your thumb and forefinger with your palm facing the surface of the paper.
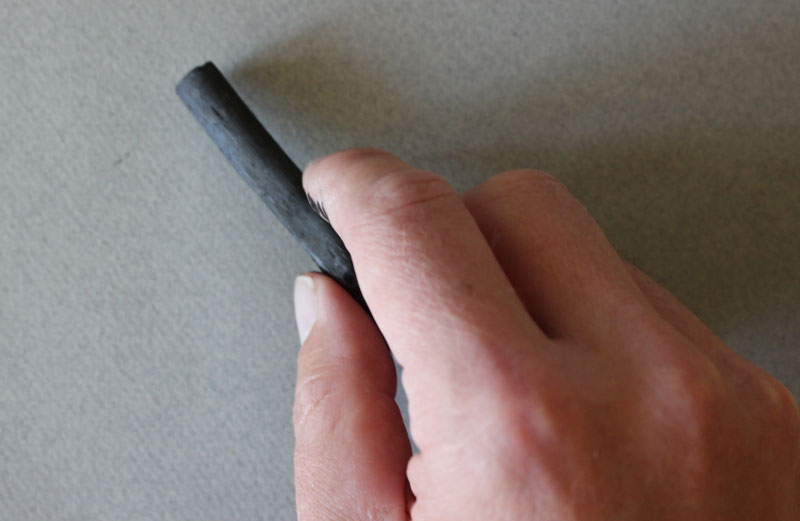
This allows you to make marks using your shoulder and elbow instead of with just your wrist.
For detailed marks, a charcoal pencil can be used and held just like a traditional pencil. More on grips for holding a pencil can be found here.
When charcoal drawings are finished, the artist may chose to "fix" the charcoal in place. Because charcoal drawings are often very dusty, this is a common practice. There are different types of fixative. There is workable fixative which allows for some work to done on the artwork after it has been "fixed". There is also final fixative, which is used when the drawing is finished. Most artists, like myself, chose to only use workable fixative, since you may chose to go back to drawing and work on it at a later time.
Fixative comes in a spray can and is applied by spraying it onto the artwork. The best way to do this is in a well-ventilated area with the spray can held about a foot away from the artwork. Hairspray can be used in place of fixative but it can darken the surface so it is not recommended.
Learning how to draw with charcoal is just like learning how to draw with any medium. It takes practice. So don't be discouraged at first. Charcoal drawing is different than drawing with a pencil. Most people are already used to drawing with a pencil, so it may take some time to become accustomed to charcoal. But don't worry, you will get better with time.
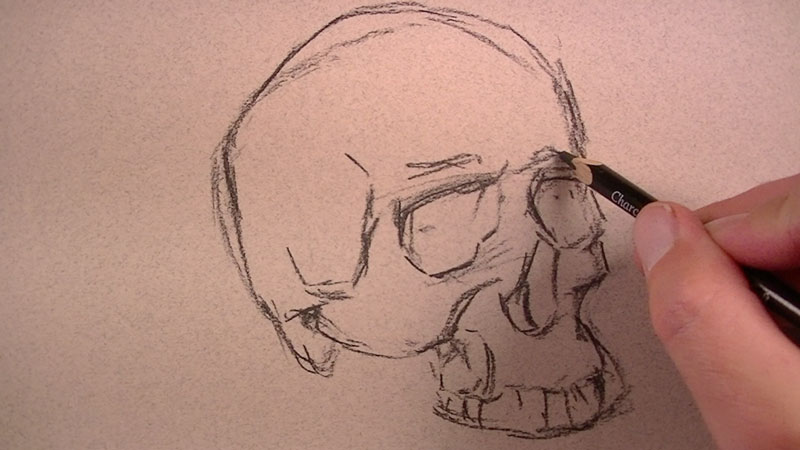
The drawing begins with a loose contour line sketch using a charcoal pencil. Areas of high contrast are noted with a line.
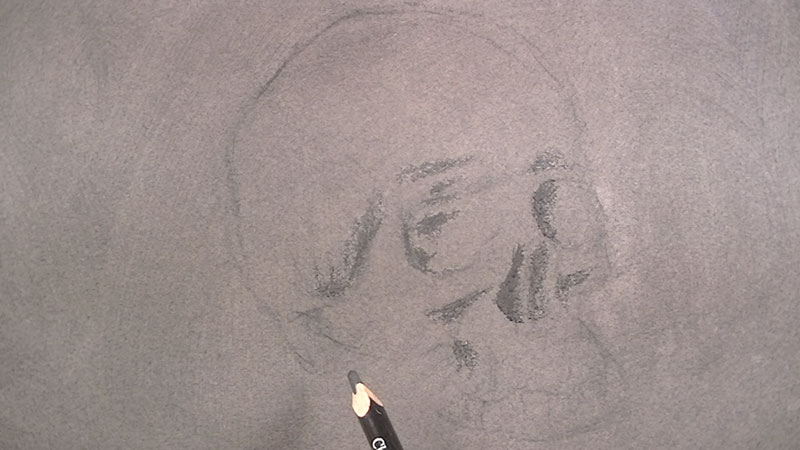
Next, powdered charcoal is spread over the drawing and worked into the surface with a mop brush and a paper towel. Darker areas are strengthened with the charcoal pencil.
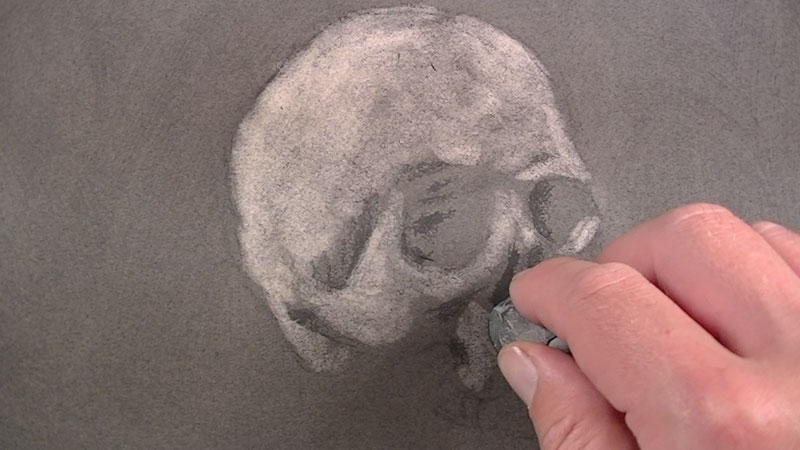
Using a kneaded eraser, highlights are erased out in bulk.
A white charcoal pencil is used to draw precise highlights. Gradations in value can be made as the white charcoal mixes with the black charcoal on the surface.
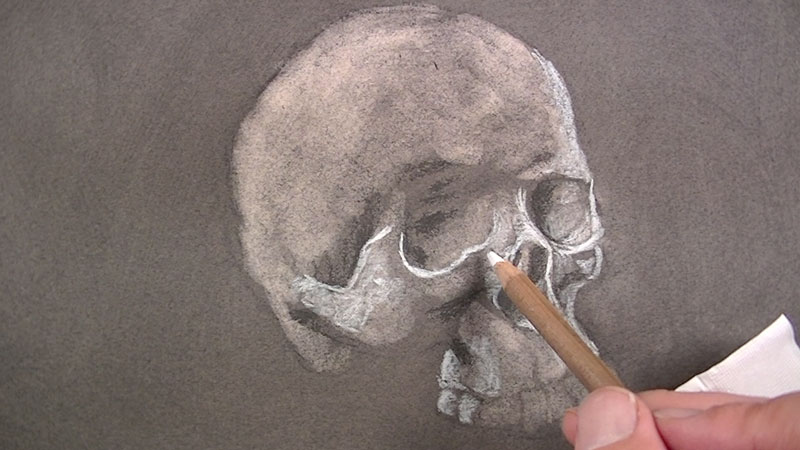
Highlights are continued throughout the drawing. Texture can be created by changing the stroke made by the pencil.
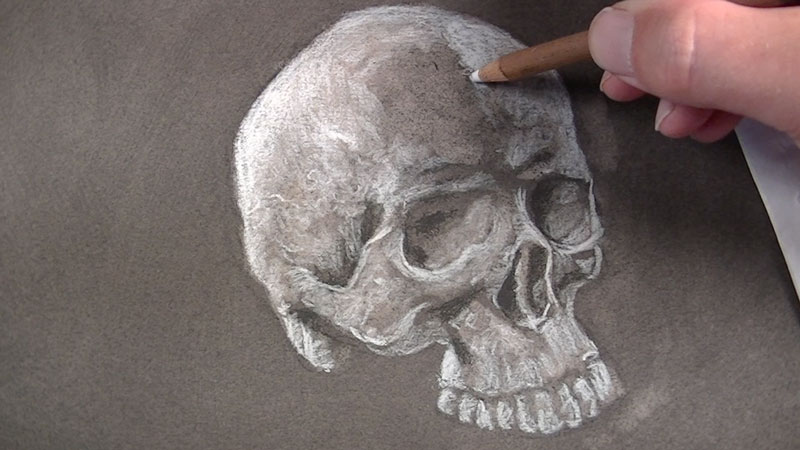
Next, shadows are darkened using a softer charcoal pencil.
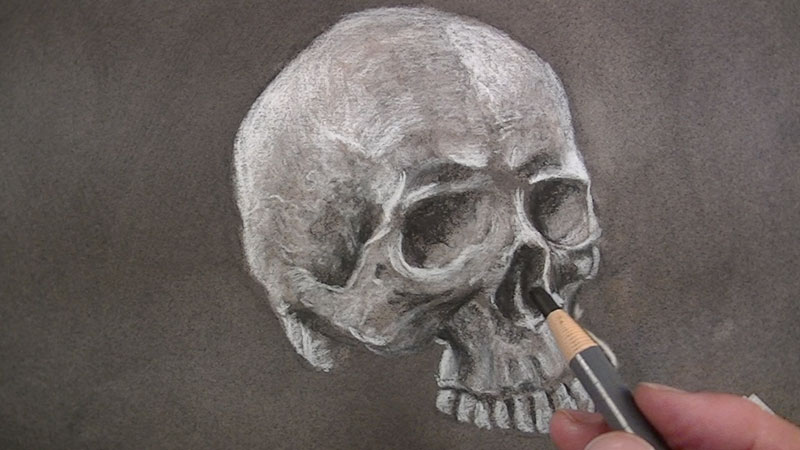
The background is then erased with a kneaded eraser to create texture and additional interest.
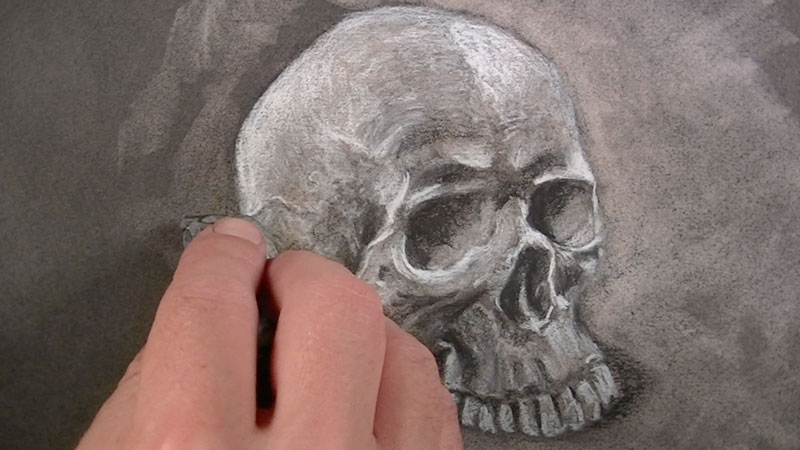
Cast shadows are created underneath the skull and "pulled out" using a blending stump.
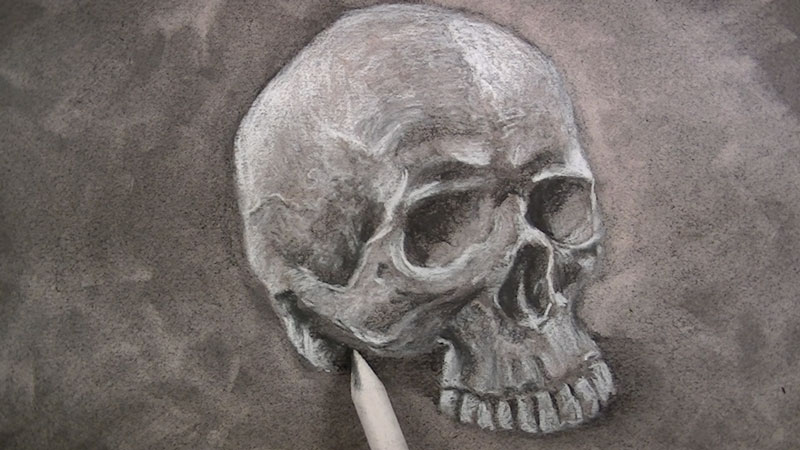
The completed drawing can be "fixed" using fixative to prevent unwanted smudging.
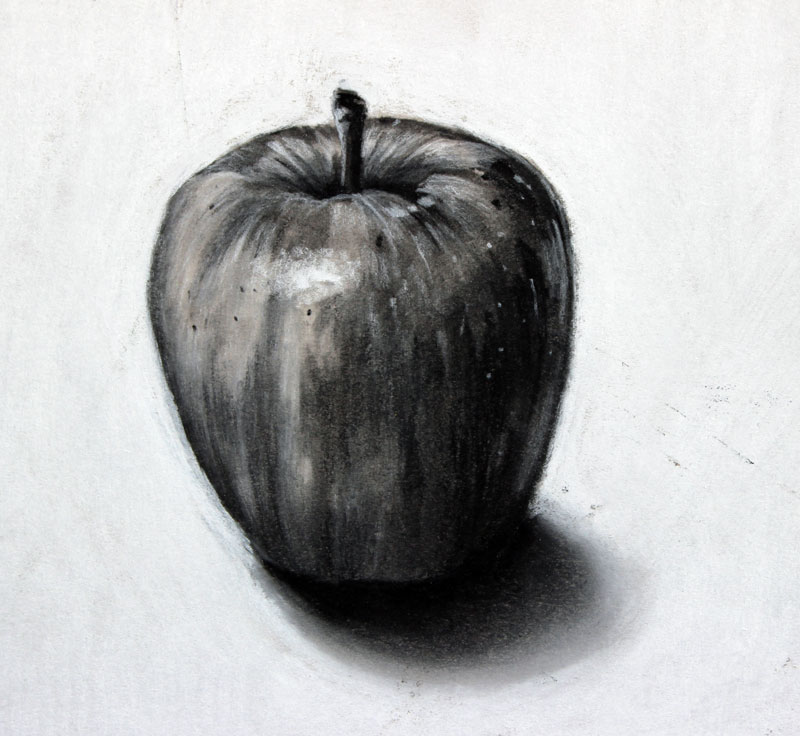
Charcoal drawings can be loose or they can be rendered to a high degree of realism. Charcoal drawing is actually closely related to painting. Because of it's characteristics, charcoal can easily be spread, blended, and erased. This allows the artist to use the charcoal in a variety of ways. One way of creating unique marks is by using the eraser to remove the lighter values (tints). This method is called "Highlight Rendering"
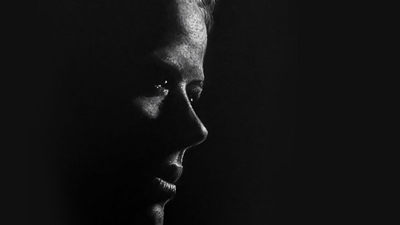
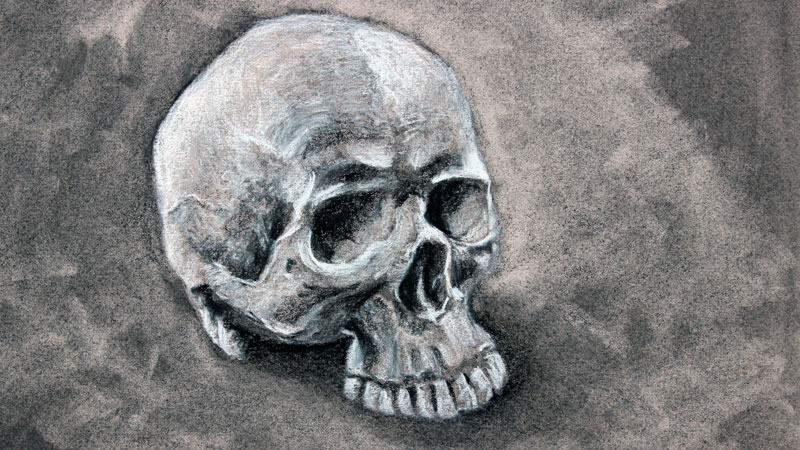
The above image is the finished result from a Recorded "Live Lesson". You can watch this demonstration here. (Requires membership.)
Charcoal can be applied to just about any surface that will accept the mark. The most common surfaces or papers have a course tooth, or texture. These papers include charcoal paper, pastel papers, and watercolor papers. Smooth surfaces are also acceptable and include newsprint, bristol board, and illustration board.
Some artists prefer to work on toned papers. Typically, when toned papers are used, both white and black charcoal are used in the drawing. Since the paper is toned, the whites are absent and must be applied in charcoal form.
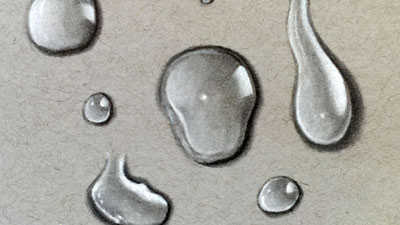
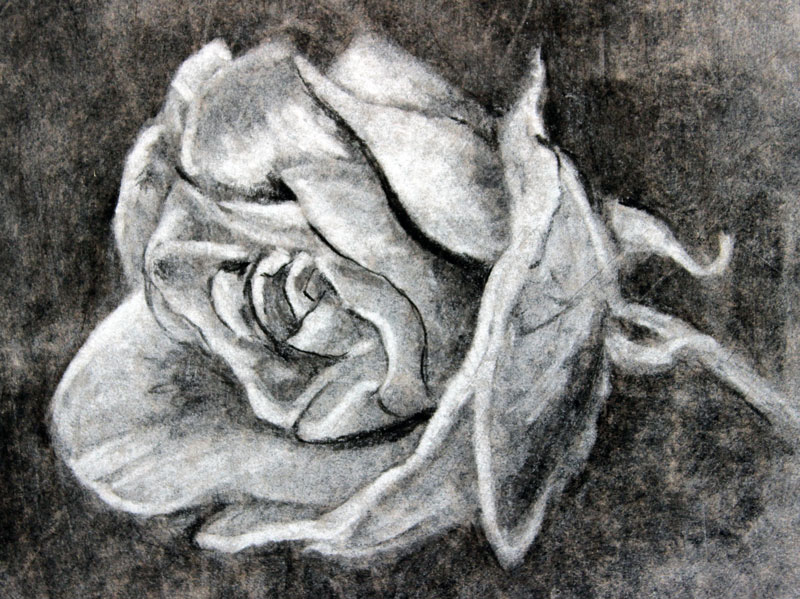
The above image is the finished result from "The Secrets to Drawing" Video Course, Module 15.
Most of the time, white paper is used. Like with watercolor painting, the white of the paper acts to "mix" grays and create highlights. You can read more about drawing papers here.